Labels
Thursday, December 9, 2010
Personalized ornaments
First I took a picture of each child from the side.
Print the picture, it can be cheap paper or even in black and white, cut it out and trace it on Black paper
I tried to find chipboard that fit the pictures but I ended up just making my own our of posterboard, you can use the hard backing of a notebook, or cereal boxes.
I inked around the edges. By rubbing the edge of the ornament on the ink pad.
I love how they turned out and I even made them for my neighbor, one of each of her boys too. The back has a printed label of "who" and the year.
Monday, December 6, 2010
A peak at the shop
Everytime I take one of these into the shop its gone in a flash. I cleaned up some old windows and put this vinyl calendar on it, I made one for myself on a huge white board in my hallway, it is a lifesaver.
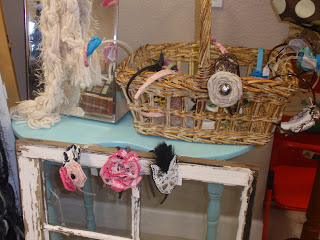
my headbands, on that is McKinley's blue desk too. only one scarf left, better get busy.
this is just some of the earings, I made a display on an old door. it works so well.
The necklaces aren't displayed in the most ideal way, but the shop is PACKED, this is just some of my stuff. I have a few other things that already sold so I didn't get any pics of them in time. It has kept me VERY busy, which is a good thing since moving out here would have left me a little bored.... However I am looking forward to the end, and hope it ends in $$$$.
Wednesday, November 3, 2010
Swords & Headbands for the Shop
 These swords have been a big hit, and they are fun and safe too. $7.
 Look at that face!
Monday, September 20, 2010
My most recent project
 I touched up the paint and filled in the holes from the ugly handles. then sanded the corners.
 I mixed about a cup of glaze with some black and brown acrylic paint.
Saturday, July 17, 2010
Photoshop help and new Jewelry
 WOW sorry thats a bad picture, but I love this bracelet, more like it are in the Etsy shop to the right!
 This is my new little invention, its a cluster with a lobster clasp at the top, you can clip it to your favorite chain, Then buy other interchangeable clusters, and save lots of money.
  Now I need to learn how to use Adobe photoshop E8. Do you have a favorite Photoshop help website or a favorite tool that I should try??? pleeeeeeeeeeeeeeeeeease I am overwhelmed.
Sunday, June 27, 2010
Protein/Fiber Bars

Here is my recipe: (this makes about 18 to 20 bars)
I tried to figure the nutitional facts from the labels then divided it by 18. here is what I got ( It is not completely accurate)
You can try more variations on this (keep in mind I figured the nutitional facts from my above recipe)
* use craisins, coconut and macadamia nuts or almonds
any other ideas? If you try them let me know what you think.
Wednesday, June 23, 2010
Winning cookies??

Sunday, June 20, 2010
Iron on T-shirts
 I found this box of Iron on's at Walmart on clearance for 7.00. Its got many girl logos like on the box, and several more sheets of alphabets to make your own....oh my the possibilities. But first of all would have to be this shirt for Westin. I had been meaning to make a freezer paper stencil for it, but it takes so long to cut out all the letters. So here we go.
 For the front I made freezer paper stencil of a bike stunt and ran over it with a toy truck that ran through brown paint. When I showed him he actually got all giddy!!! I realized I had been making too many girl things lately.
 This is my practice shirt, I pulled out a shirt that was too small for my 2 year old thought of some letters to put on the front I think it looks cute enough for a present. I will have to send it to some DIE HARD OSU fans.
Friday, June 18, 2010
summertime snacks
 My solution to kids constantly raiding the snack cupboard! I also had several cereals that my kids were tired of. Add chocolate chips, marshmallows, and nuts and its a whole new snack!
the cereals I used were - Chex, golden grahams, cheerios. The kids each have a small container with their name, and they have to stay out of the cupboards!! or ELSE!! I have another list of things they can choose from - yogurt, string cheese, a fruit snack, and an apple. Some days it works, some days I have to remind them or get after them for sneaking stuff.
Tuesday, June 15, 2010
Toddler Time
 I needed something to entertain these two while I made dinner for 7 kids that night. the older 5 got tired of "babysitting" I realized if I put a box of dirt on the deck, I could easily watch them and they were so entertained for almost an hour. It was the best!! Of course once dinner was ready we ate it outside and then those two got straight in the tub. Since neither one of them have sandboxes at their house it was quite a treat. Last night we did the same thing with a huge bowl of water and measuring cups.
**I am still "Celebrating a Crafty summer" all month long, any other bloggers want to join in? or do you have an idea to add? Just leave me a comment. Especially if you have a tip for keeping these guys busy while I make dinner.
Friday, June 11, 2010
Lego stories 4 kids.
Westin age 7 thought of this all by himself. He asked if he could make his own book, and he would get the lego's posed perfect and have me take a picture for him.

Each story had about 4 or 5 pictures in it. So far they are all scripture stories because this happened to be on a Sunday and he wanted to make a book that would be good to read on the sabbath. I love his sweet moments. They are kind of rare these days.
Another book he made was an I spy book(he's a little obsessed with anything I spy). a year ago he would take pictures of toys that he had arranged in a pile. Then another picture of just a few items that you have to look for. I am sorry that I don't have any pictures of that one anymore.
Thursday, June 10, 2010
BLOG SWAP WITH NIGHT OWL CRAFTING
Hello My Craft Closet followers! I am so thrilled that Becky is letting me take over her cute blog today! I love following her blog and looking at her amazing creations!
I started blogging back in 2008 and decided that my personal blog was being over taken by my crafts. So I started my craft blog to share my creations and inspirations that I receive from fellow bloggers and crafters. I host 2 link parties each week. The first one is on Tuesdays and it is called
Hoo are you Tuesdays!

This party is where you answer a few questions I ask each week and then link up your post! This is a party to get to know each other outside the craft world!
The other one is held every Wednesday and it is called
This link party is where you can come and show off whatever you have been making!
I hope you will come and link up to both parties! I also am looking for more AMAZING blogs like Becky's to blog swap with me!
Today I want to introduce you to my new favorite product!
WASHI TAPE!
I am loving this product! I have made a few things with it recently!
I first started by making these cute clothes pin magnets! Check out how I made them here!
I then decorated my vases with the Washi tape! If you want to know how to do this click here!
Today I want to show you what I did with Washi Tape using binder clips!
Aren't those cute and so much easier than modge podging paper on!
another J crew inspired shirt.

Here My blog post from blog swap with Night owl Crafting.
My mother and all my grandmothers were seamstresses, and baking pro's. My mother actually made Wedding dresses and had a successful business when I was younger. That is of course where I learned to sew. She even tells me stories about how my grandmother would ride into town with my grandpa and sit in the car in front of the clothing stores and sketch the cute newest fashions, then she would go home and make things out of the hand me downs they were given. I think that is so cool, that she was refashioning back in the 1940's too. They had a small farm and 5 girls and 1 boy. So money was super tight. Right now I am OBSESSED with jewelry and have an etsy shop here above and below is a sampling of the projects I have made recently.

I love to copy ideas from jcrew (below)or anthropologie.

Here is my latest attempt.I started with my husbands pink shirt which I figured he was never going to wear.
 I took in the sides, and used the scraps from that and the sleeves to make a ruffle to line the neck area. I also had to make a facing for the neck and arm holes, to hem them. I did this by laying the shirt on the scrap fabric and tracing the curve. easy peasy.

I totally love it. I think it is my new favorite article of clothing, I wore it yesterday and got lots of compliments.
I hope you enjoyed it, Thanks Leslie for letting me blog swap with you and your cute blog! I hope you will all take a look and let me know what you like. Today is the kick- off of my "Crafty Summer" I will be posting something every weekday in June. I hope you will join me.
Becky
Wednesday, June 9, 2010
what I've been up to.


 Mckinley's spring scarf i made with fabric off the remnant rack. probably cost .50 It is about or 8 inches wide, then sewn into a ring. after that I soaked it in water and wadded it up and sat it in the sun to dry. Here is a good tutorial at ruffles & stuff.
Friday, May 28, 2010
The Scrunchy shirt tutorial
FIRST you need to start with a shirt that is a little too big. A tight fitted shirt will not work, the scrunching will bring it down about 1/2 a size, depending on how much you do.
 now after you take it off, outline with a fabric marker or chalk the area you want to work in.
 Here is an example of a pattern I chose. THERE IS NO EXACT PATTERN OR PROCESS TO THIS. Just sew in zig zags or figure 8's until you fill the area. This is the way I ended up doing it because there was less turning, lifting foot, and backing up. It was super easy. Believe me, cause I don't do hard stuff. --The only thing to watch for, is trying to keep the circle areas around the same size, that is where the fabric will pop out.
 This tank was SO baggy I decided to do a middle section, I really like it on my bathroom floor, not sure how I like it on me. I added little ribbon flowers to disguise how some of the areas are a little off centered.
 ANY QUESTIONS??


