Before starting you need to decide on the length, If you have a watchband measure it. If not measure a bracelet that fits nicely and subtract the length of the watchband.
Step one: Cut about 14 inches of stretchy bead/Jewelry cord.
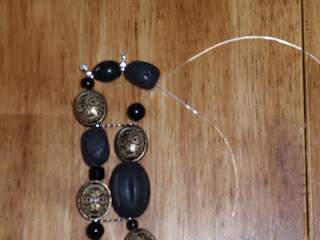
After you have designed how you want your beads to be you will start with an end bead, slide it all the way to the middle, and put a lobster clasp on each side of the bead.
 Step two: start beading - by putting a bead on each side, you want the beads to equal the same length when it is time to add the spacer bar. you will add one when you get 1/3 the bracelet done and again at the 2/3 length.
 Step three: I add a few extra small beads to each kit so you can make them longer or add them to make the sides match up. Below I added a small bead on the left to make it match the right side.
 Step Four: Here is the second space bar at 2/3 the way through the band.
 Step Five: I add the final beads putting most of them on one side, lobster clasps and all.
 below will help make sense of why I do this.
Step Six: The knot will be on the side now, and will be hard to notice. Put a drop of superglue on the knot. Also if your knot is right next to the clasp the superglue might seep into the clasp and ruin it.
 I hope I explained it clearly, If you have any questions please just ask in my comments.
Step one: Cut about 14 inches of stretchy bead/Jewelry cord.
After you have designed how you want your beads to be you will start with an end bead, slide it all the way to the middle, and put a lobster clasp on each side of the bead.
 Step two: start beading - by putting a bead on each side, you want the beads to equal the same length when it is time to add the spacer bar. you will add one when you get 1/3 the bracelet done and again at the 2/3 length.
 Step three: I add a few extra small beads to each kit so you can make them longer or add them to make the sides match up. Below I added a small bead on the left to make it match the right side.
 Step Four: Here is the second space bar at 2/3 the way through the band.
 Step Five: I add the final beads putting most of them on one side, lobster clasps and all.
 below will help make sense of why I do this.
Step Six: The knot will be on the side now, and will be hard to notice. Put a drop of superglue on the knot. Also if your knot is right next to the clasp the superglue might seep into the clasp and ruin it.
 I hope I explained it clearly, If you have any questions please just ask in my comments.
I also have plenty of watchbands, and Watchband kits in my Etsy shop.

2 comments:
Oh my goodness...thanks for sharing how to make this! I better get bead shopping:)
Thanks for this tutorial, I went and bought beads yesterday wanting to make one of these but not having any idea how to go about it.
I bought the watch face about two months ago and have been stalling because I thought it was going to be hard LOL
Thanks, you rock!
Post a Comment