

Thursday, October 20, 2011

Wednesday, October 19, 2011
Wear it - Wednesday - My Little Knight
First, are my eyes playing tricks on me??? According to Blogger yesterday was my 200th post?? How could that be right? Oh well, I guess I should give something away.
**update** click here for my giveaway, closes Wed, October 26th
Check back tomorrow to see what I come up with, it will be so fabulous, hmm. It should be worth $200 to make the whole thing more memorable. I am so excited!! Jewelery? Craft supplies?? hand sewn items?? little girls tutu's? boy's ties? yes, I think so.
Follow my blog so you are sure not to miss out!!
Okay on with today's post, a couple of weeks ago, Cheri at I am Momma made her little boy a t-shirt to wear with his beloved Viking helmet. It seems he was going through a Viking Helmet obsession. As I read this, I laugh and look at my own three year old who was, at that very moment, sporting his favorite Knight helmet, and waving his sword at me.


Then I removed the freezer paper and let it dry a while. Next I drew my own shield and cut it out of freezer paper and ironed it down. I carefully painted around the dragon with SILVER tulip metallic fabric paint.

I showed this shirt off on Top-toberfest at Leafy Tree top spot.
**update** click here for my giveaway, closes Wed, October 26th
Check back tomorrow to see what I come up with, it will be so fabulous, hmm. It should be worth $200 to make the whole thing more memorable. I am so excited!! Jewelery? Craft supplies?? hand sewn items?? little girls tutu's? boy's ties? yes, I think so.
Follow my blog so you are sure not to miss out!!
Okay on with today's post, a couple of weeks ago, Cheri at I am Momma made her little boy a t-shirt to wear with his beloved Viking helmet. It seems he was going through a Viking Helmet obsession. As I read this, I laugh and look at my own three year old who was, at that very moment, sporting his favorite Knight helmet, and waving his sword at me.

To make the pattern : I laid the shield on the copy machine to get the dragon outline, i copied it directly onto freezer paper to save the step of tracing. After cutting it out with an x-acto knife I ironed it to the shirt, and with a stipple brush painted on the GOLD tulip metallic fabric paint. IT IS SO SHINY AND COOL.

After cutting it out with an x-acto knife I ironed it to the shirt, and with a stipple brush painted on the GOLD tulip metallic fabric paint. IT IS SO SHINY AND COOL.


Usually the helmet is pulled down over his nose.
I think he is adorable no matter what he is wearing, but that's always how it goes with the youngest right? I feel like I have to use my every last little bit of crafty/sewing mommy ability while he is still little and will let me. My older kids don't always appreciate it. So I guess you could say he is SPOILED ROTTEN and he and I are both loving it!!I showed this shirt off on Top-toberfest at Leafy Tree top spot.
Tuesday, October 18, 2011
Tuesday Tips - Easy Distressing for small projects.
closing Wed. Oct. 26th

There are so many ways to distress something, or antique it. Here is a simple way that you can't really mess up, for something that might be small.


I wanted a lot of paint this time. I waited longer tooI waited 5 minutes then gently wiped off with a wet paper towel. every where I had sanded it was White. Love it.

I followed the same process with this one only I used a very fine grit sand paper and only sanded where I wanted white to stick.

I forgot to take before pictures. This red one was too bright. It is not made of wood, so I didn't want to sand it. I watered down some black paint. maybe a quarter size dollop of paint and 6 or 7 drops of water. Use a sponge brush to cover it.
* The darker you want it to look, the longer you wait. I waited about 2 minutes. then used a wet paper to wipe the paint off. DON'T SCRUB, just wipe until it looks good.


Finished. It is so Tall and pretty, and I found it at the thrift store for 5 bucks, SCORE.
Here are the 3 smaller ones I put on my redecorated entry. I will be featuring the entry next week.
I LOVE IT.
Thanks for stopping by, and Please leave a comment, they make my day
Have a lovely week ~ Becky
Monday, October 17, 2011
Monday at My House - so so so so happy
Saturday is the only day I get to have my hubby here, most of the time he travels or works INSANE hours. He is my SUPER HERO. He doesn't love to do my annoying decorating projects. But this Saturday he spent the WHOLE day doing "honey do's" for me. Did you hear me......THE WHOLE DAY!!! He even made a couple of dreams come true for me. (I am cheesy) Maybe it makes a difference that I have been asking for a tile back splash for about 4 years. AND when I say asking...I do mean nagging and begging. We have had some of these supplies for a very long time.
 Cutie Pie! wanted to help, well for a minute. As soon as I snatched a picture he was off to play. "That's boring mom."
 So there it is before. We, well.. I, had planned this in our last house, lucky we never got it done, so we had some of the stuff all ready when we moved here.
 Check out this Tile setting Mat. It saved us a DAY. Normally you apply the mastic, then the tile, and wait 24 hours before grouting, and it is MESSY, Messy, MESSY!
This stuff was so cool, I HIGHLY RECOMMEND IT. We really needed to do this in one day. It is 18"x 9" and comes with 12 sheets. for about 15$. SO WORTH EVERY PENNY.
 It went pretty smooth, and we didn't have to do much cutting,

 See the beautiful kitchen?? Even my kids said, mom it looks like a different house!! It took us about 4 hours start to finish. for a 12 foot wall of back splash.


This stuff was so cool, I HIGHLY RECOMMEND IT. We really needed to do this in one day. It is 18"x 9" and comes with 12 sheets. for about 15$. SO WORTH EVERY PENNY.


Friday, October 14, 2011
Fabulous Fall Friday - Wreath
If you are following the Follow Me Friday Blog Hop.... from Trendy treehouse Cleck here to learn more about Me!

So I was going to make this my Thrifty Thursday, but I had to go to "town"and ended up gone from 9-5, ever have one of those days, whew, I was sooo tired. the only thing I had to actually BUY for this was the leaves, and they were $1 at JoAnns. Everything else I had on hand.


So I was going to make this my Thrifty Thursday, but I had to go to "town"and ended up gone from 9-5, ever have one of those days, whew, I was sooo tired. the only thing I had to actually BUY for this was the leaves, and they were $1 at JoAnns. Everything else I had on hand.

even the corn husks. I froze a lot of corn this year, so there was a mountain of this stuff in my garden. The wreath was .50 at the thrift store, I think I bought it last Christmas time. I tore the husks into smaller strips, and I used hot glue, for almost everything.

Paint stamps and tiny square of burlap were just in my stash, and the little $1 frame I bought for another project, I guess I will still have to get one for that when I am ready I guess.

Use a sponge brush to lightly brush on the paint, and practice on paper. A stencil would work great too.

Break the back off the frame, and wrap wire around it to attach it to the wreath. I think it would be cute to write Fall if my frame was a little bigger.

Finished. I really love it, but..... my front door is still white so it doesn't look very good. I guess I better paint the door.
Wednesday, October 12, 2011
Wear it Wednesday - Sew Many Skirts
Last weekend I was talking to my hubby and saying. I stayed home all summer and I can't remember what I did besides yell at the kids to do their chores, he told me to go check my closet. OH, yes, now I remember. I wore a different skirt once a week for sure.


Here are the skirts I made myself this summer.

a brief description so you can AGAIN see how cheap I am.
#1 was a 9.99 skirt I got at Ross at least 3 years ago. It was too small in the waist and went to the ankle, so I chopped the top 6 inches off added the proper amount of elastic and.... voila, an updated skirt, knee length, but best of all it finally fit me so NEW SKIRT #1. YAY ME
#2 Purple skirt, funny story - On our way to my nieces wedding, which I had been wishing for a purple skirt, but sadly no time to make one before leaving on the long road trip which we were counting as our summer vacation. Then while we were stopped at our friends house for a couple of nights in OR, I realized I had not brought a skirt. We (me and my friend Kristen) were so disappointed that we were going to have to go shopping. Super, Super sad huh?? well I couldn't find anything I liked, so we ran to the fabric store, grabbed some stuff, went back to her house, and got out the sewing machine. It only took like an hour. and cost about 6.99 or less, I am sure I had a coupon. Plus I whipped one up for Kristen too.
#3 Bored to tears of my only knee length black knit skirt I made this one out of the $5 dollar 5 yard bolts at Walmart, I love those sales. so $5 plus $1 for elastic. love it.
#4 is a corduroy fabric with brown and some turquoise in it. I remember buying it 5 years ago, it was one of those memorable days at the fabric store. I love it but have never had time to make it, I used the waist band of some comfy stretchy pants that were in the throw away pile. Now that was a fast skirt and I don't really remember how much the fabric cost but does it really matter? Its been 5 years. hahaha
#5 the last one was a splurge I really wanted a yellow and grey skirt so I went to the "expensive" fabric store. I think I bought 2 yards @ 9.99 each. and had a lot left over. which made a super cute tie for my cousins little boy. and I think I can make one more.
The gray layer was another 5 yards for 5 bucks bolt from Walmart, and I have plans to make a gray skirt for winter with it.
Tuesday, October 11, 2011
Tuesday Tips - Tomatillo Salsa

I just think the peaches and salsa are so pretty, don't you. Well my friend Paige introduced me to Tomatillo Salsa this year, she brought me a little jar to taste it and a bag full of them, WOW, it is good stuff. here is her recipe.
Tomatillo Salsa
5 1/2 c tomatillo's (blended)
1 c onion
1 c peppers
1/2 c white vinegar
4 Tbs lime juice
4 cloves garlic
2 tbs cilantro
2 tsp cumin
1/2 tsp salt
1/2 tsp hot pepper flakes
Bring ot boil simmer 10 minutes, put in hot jars, leaving 1/2 inche headspave
process 25 minutes.
Monday, October 10, 2011
Monday at My House - Kitchen Wall


I also love having the salt and pepperon that little shelf right next to the table. Do you always realize you forgot it after everyone is sitting down? WELL I DO.
Click here to find out more about the silver ware art, or here to see where I got the printables.

Friday, October 7, 2011
Fabulous Friday - Kitchen Art

Here is another piece I put together for my "freshly" painted kitchen wall. Monday I will show you the whole wall after its all put together.

I started with a cute piece of framed art from Family Dollar. It was on sale for 3.50 and is about 10x14.


all it took was some E-600, (already had) some old old silver ware I rescued from my mother-in laws trash (free) and a piece of scrapbook paper I already had. (.50)
 Well there you go, Easily done for under 10 bucks, and I finished the whole thing during one episode of The Office,
Thursday, October 6, 2011
Thrifty Thursday - printables
Can you get more thrifty than Free? How about just a little ink, and an old frame-- repainted of course.
I just painted the kitchen and I am about ready to hang all the pictures, I am just looking for a few last things. Here is a thrifty tip. THere are some CUte Cute CuTE printables out there, I finally found an adorable Kitchen one on this cute blog, Life with the Ellwoods.
 I am also using some from I am Momma Hear me Roar, as I redo my entry, I am making a gallery wall, kinda of like the one I linked to. She has a great gallery wall. THey are also all over in the pottery barn magazines.
 Here are her printables she created.
It is so thoughtful of these cute girls to share their artwork with us. So if you use it please let them know, and tell them where you heard about it.
I just painted the kitchen and I am about ready to hang all the pictures, I am just looking for a few last things. Here is a thrifty tip. THere are some CUte Cute CuTE printables out there, I finally found an adorable Kitchen one on this cute blog, Life with the Ellwoods.

It is so thoughtful of these cute girls to share their artwork with us. So if you use it please let them know, and tell them where you heard about it.
Wednesday, October 5, 2011
Wear it Wed. - Skirt for a Preteen

Have you sewn anything recently?
♥ Becky
Tuesday, October 4, 2011
Tuesday Tips, make a short necklace LONG
Here is a little tip I use a lot,
You can have a lovely necklace, but if its not the perfect length, it just doesn't work right with whatever outfit, and I really don't like feeling like I am being choked.
Well you can easily extend those short necklaces and make them longer
With these few supplies.

attach the clasp to one end of a piece of chain, the jump ring on the other end, the length of chain will determine how long your necklace will be.

 not long enough for this shirt.


With an extra large extender it can be an awesome necklace. You can even just use ribbon. EEEEK I LOVE IT!
You can have a lovely necklace, but if its not the perfect length, it just doesn't work right with whatever outfit, and I really don't like feeling like I am being choked.
Well you can easily extend those short necklaces and make them longer
With these few supplies.

attach the clasp to one end of a piece of chain, the jump ring on the other end, the length of chain will determine how long your necklace will be.


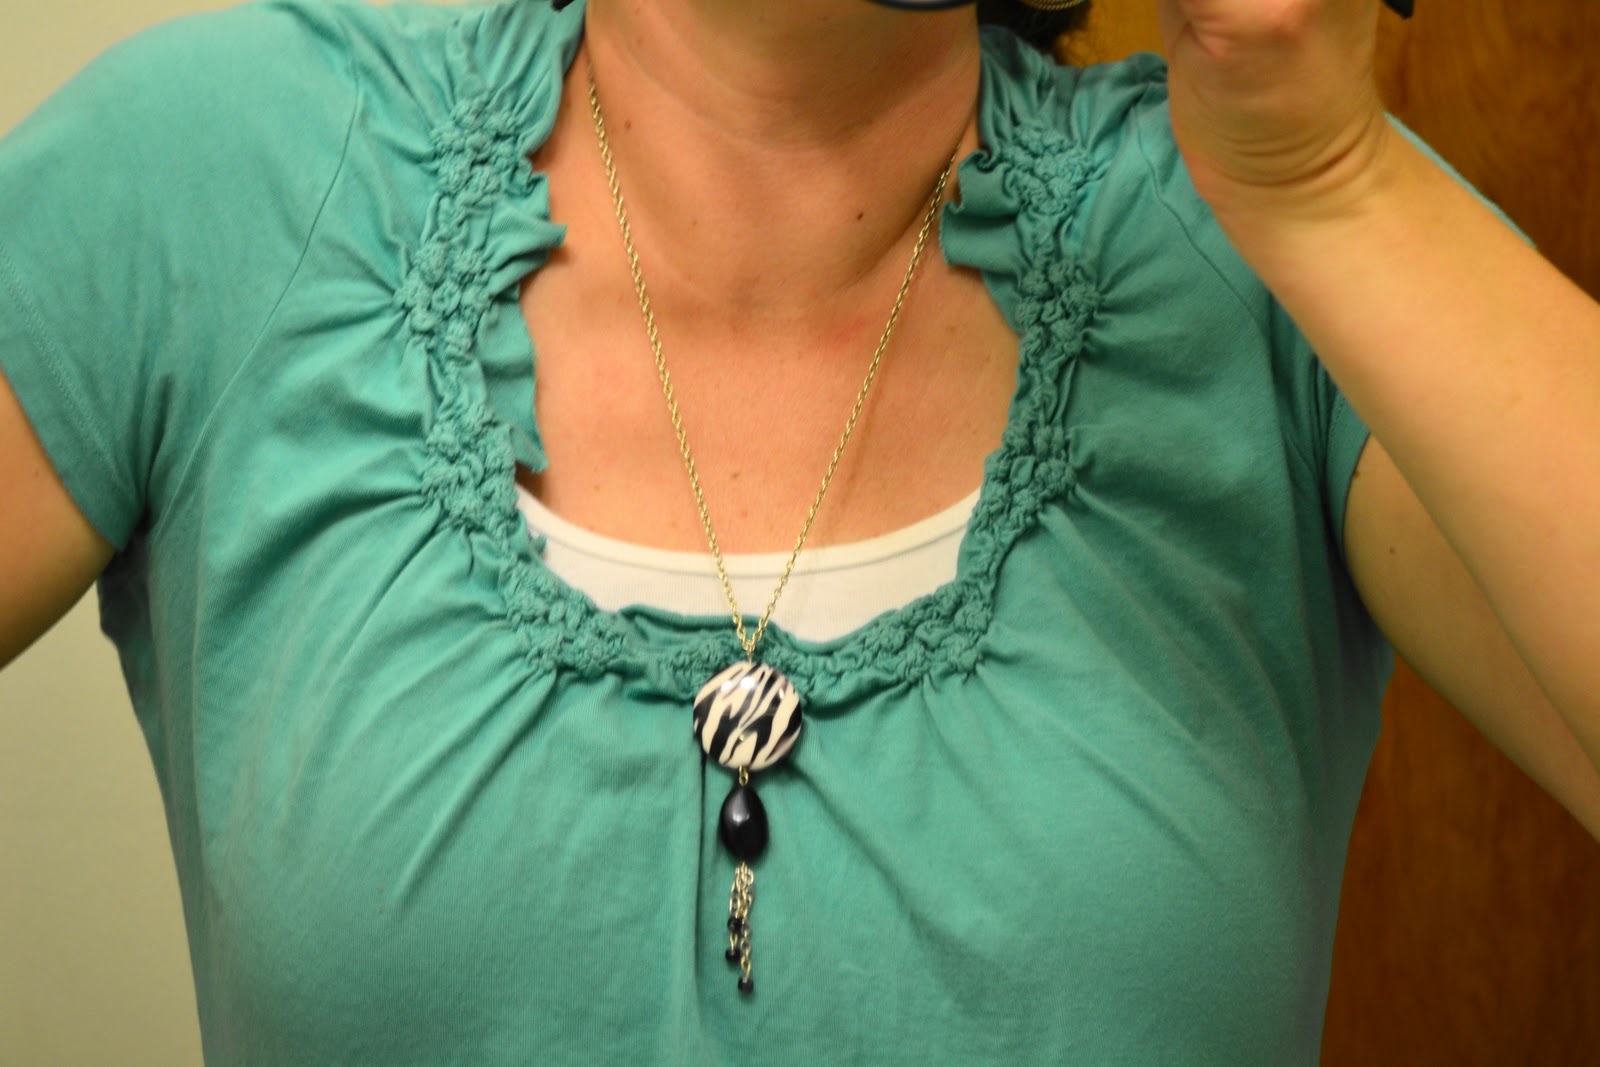
only slightly longer but much better, I might make a longer extender for this one, but then you would have a picture of my gut.... I didn't think you deserved that.

Now here is my favorite bracelet, I fell in love with it when buying some shoes for my daughter, and in the bag it went... only when I gave my little darling the bag, she thought WOW, thanks for the bracelet mom, I am going to wear it on the first day of school...... What was I supposed to say? So I borrow it a lot. haha

With an extra large extender it can be an awesome necklace. You can even just use ribbon. EEEEK I LOVE IT!
Subscribe to:
Posts (Atom)
